 To view the layout of each hole and player's tip, click on each link below. Alternatively you may click the "Expand All" button to view all holes at once.
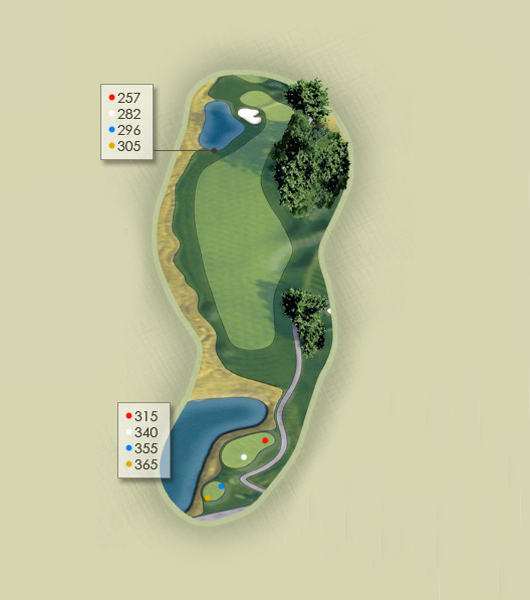
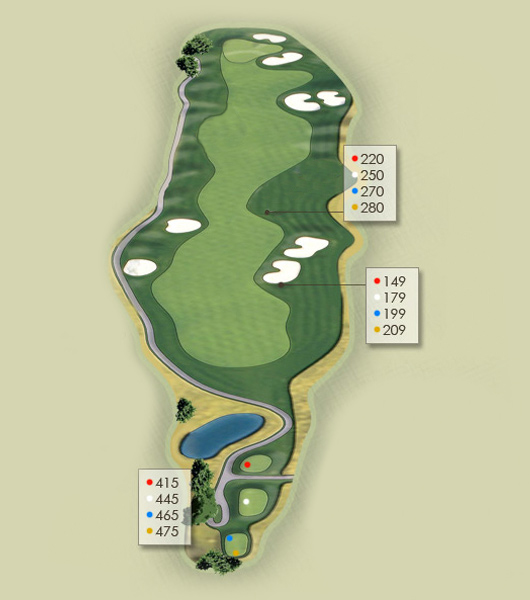
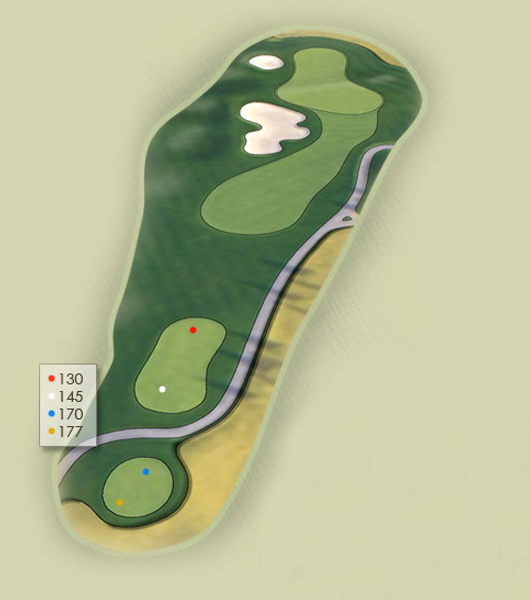
Playing towards the left side of this fairway makes for a much easier shot into the green.
Caution: A left pin requires extra carry over the bunker
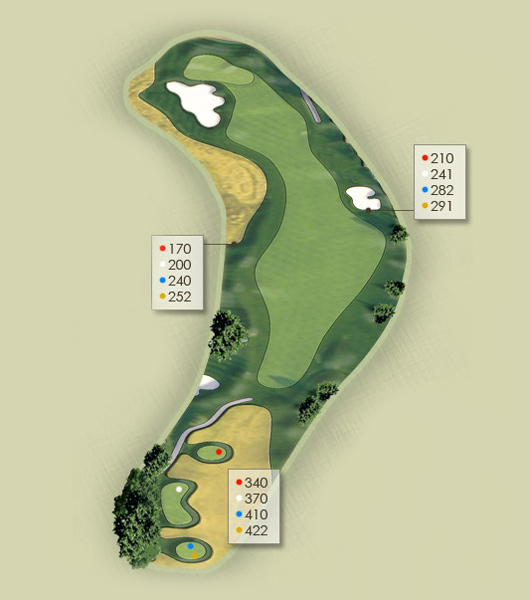
This gentle dogleg left plays as one of the hardest on the course. Aiming towards the last bunker on the right should leave you in the middle of the farway.
Avoid the environmentally protected area that plays down the left side of this hole.
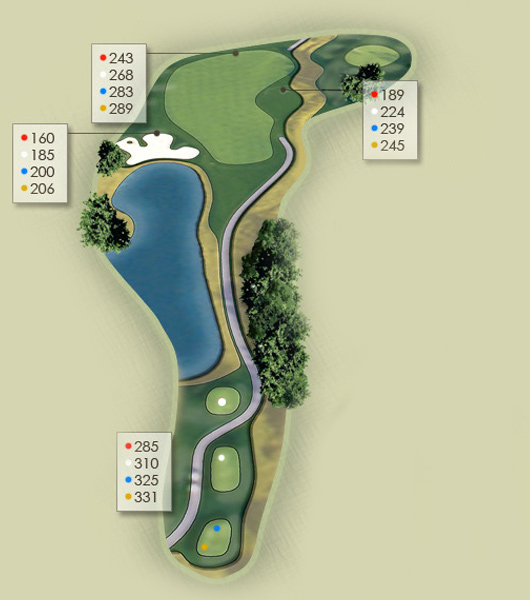
Anywhere in the fairway is good! The wetlands that wind along the right side of this hole are easily reached near the bridge.
Play your second towards the front edge of the green and hope for two putts. Par is a good score on this hole.
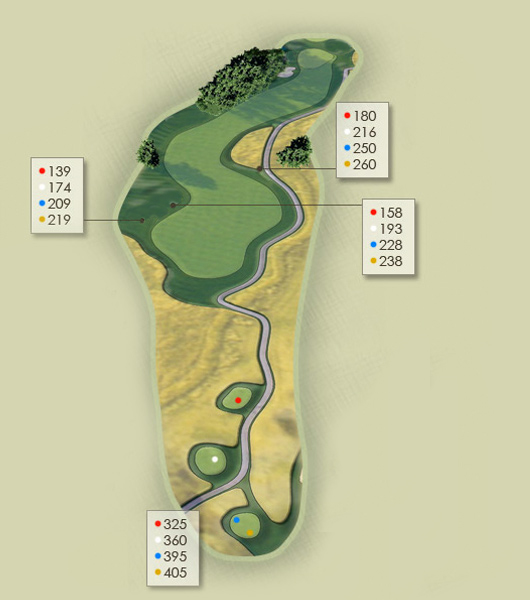
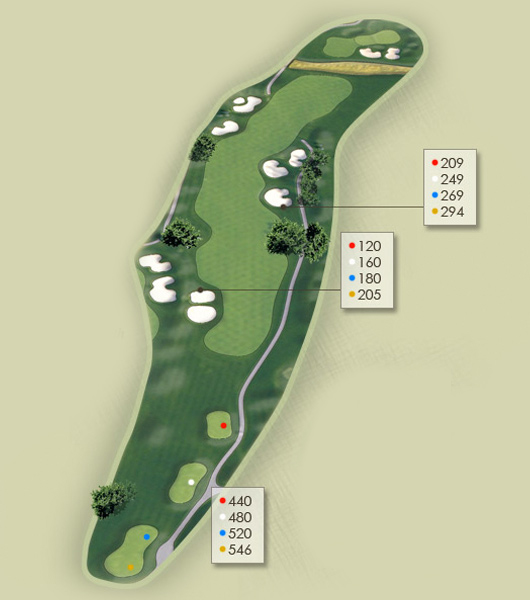
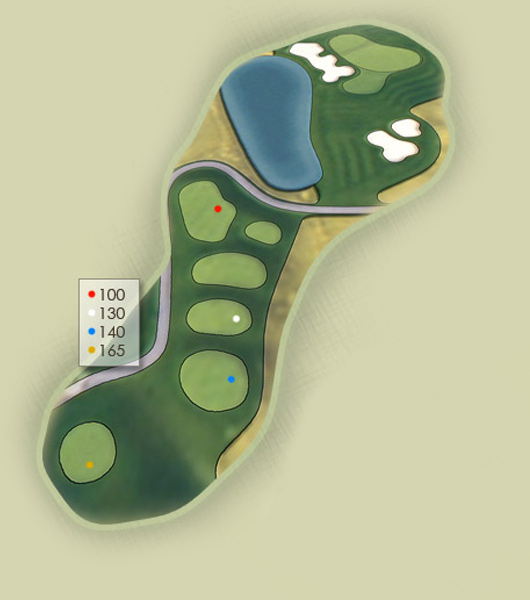
This short par five tempts players to go for the green in two. Strategically placed fairway and green side bunkers await errant shots.
Approaching the green from the hundred yard marker provides players with an even lie and a short iron into the green. Play to the center of the green when the pin is tucked on the right hand side. Limited landing room and a nasty rear bunker protect this pin.

The wind can have a significant impact on your tee shot; club selection is crucial.
Use the slope of the green to your advantage.
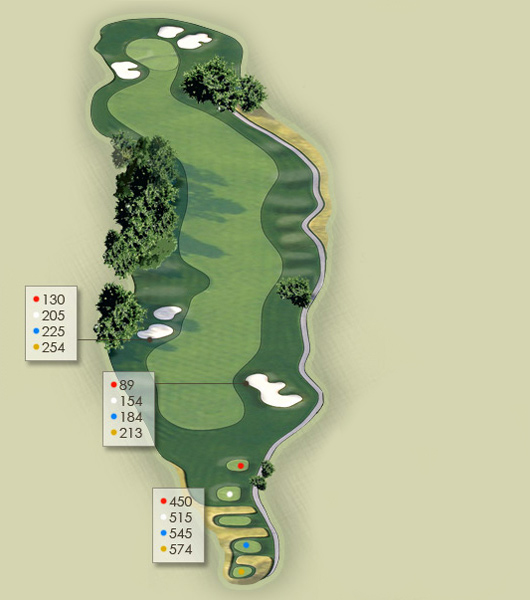
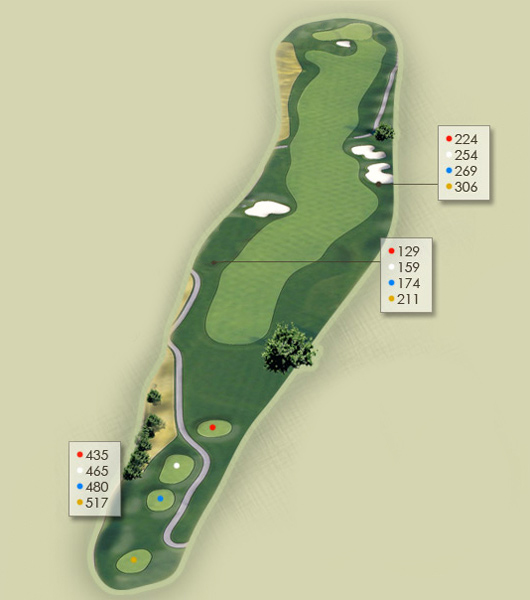
This par five usually requires three good shots to reach the green.
Aim your tee shot to the right side of the fairway.
Try to keep your second shot to the left of the tree, taking advantage of the sloping fairway.
Staying below the hole is a significant advantage when putting.
Play smart!
Aim for the 100 yard marker, then attack this receptive green with a short iron
Proper club selection and execution is critical.
Dramatic elevation changes on this green make putting from one tier to the other extremely difficult.
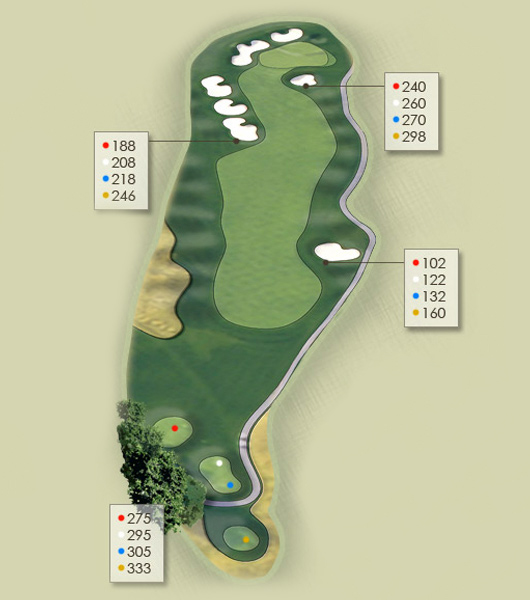
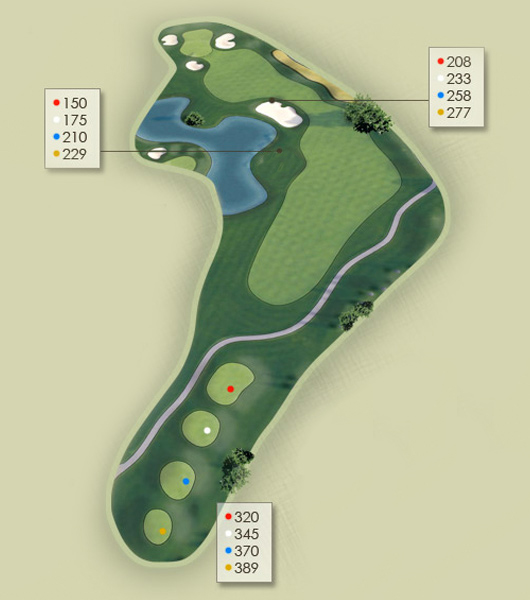
Wetlands wind along the right side and eventually in front of this hole. An accurate drive to the center of the fairway sets up a fun approach to this two tiered green.
Aiming towards the cetner of this fairway takes both the bunkers and water hazard out of play but sets up a demanding approach to this well guarded green.
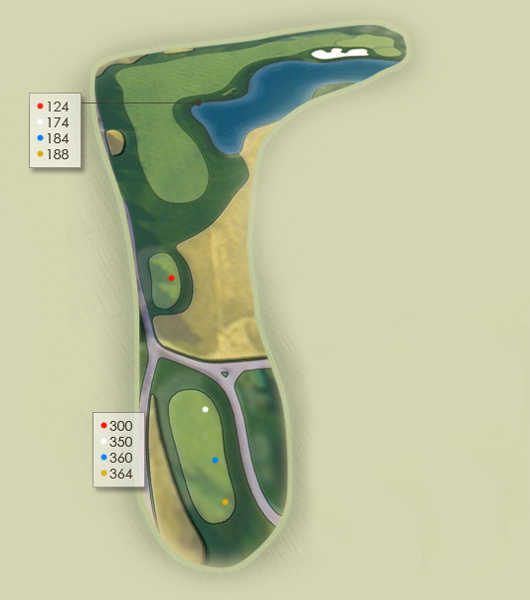
Cutting the corner may be enticing but should be reserved for the long hitters. Errant shots right and through this dogleg are likely to be out of bounds.
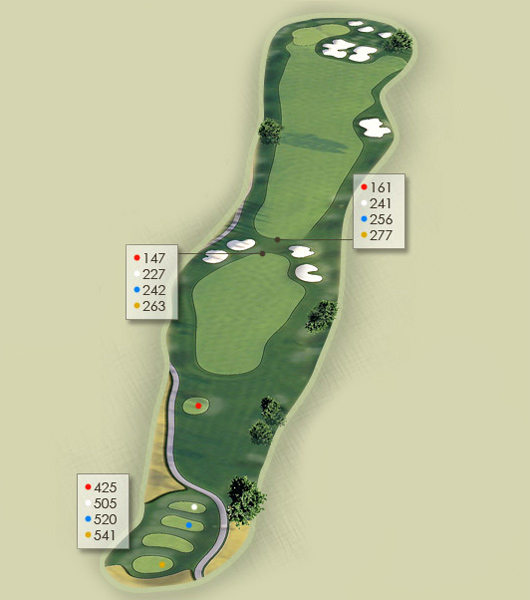
Going for the green in two isn't advised on this par five. The rolling fairway slopes dramatically towards a small creek once inside 100 yards.
A well placed second shot inside 150 yards provides the player with a level lie and an easier approach.
Deep, unforgiving bunkers guard the front portion of this narrow green.
Aim your tee shot over the bunkers guarding the left side of the fairway in order to set up the best approach.
Be cautious of the water hazard behind this green.
Accuracy and club selection are crucial on this hole. Use the backboards on both tiers to control your tee shot.
This dramatic dogleg dares you to cut the corner. Beware of the relatively small landing area. To avoid a big number, play safe and follow the fairway. This deep green often requires an extra club on the approach.
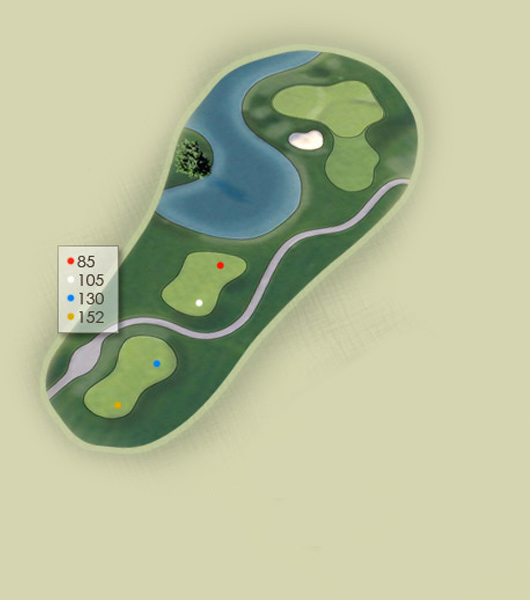
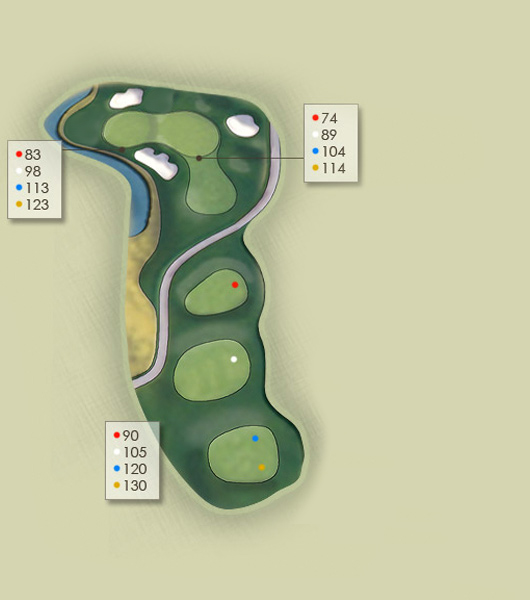
Pin placement and playing conditions influence play on this hole. Water guards three sides of the green and the wind consistently blows into the player's face. Think wisely about your club selection and target.
Despite being one of the easiest par fives on the course, don't get greedy. Smart, well placed tee and second shots set up an approach with a chance to get close to any pin placement.
Leaving your second shot 150-100 yards eliminates uneven lies and changing elevation on your approach. Going to the green in two brings deep bunkers and tricky chip shots into play.
This hole rates as the region's best chance for a hole in one.
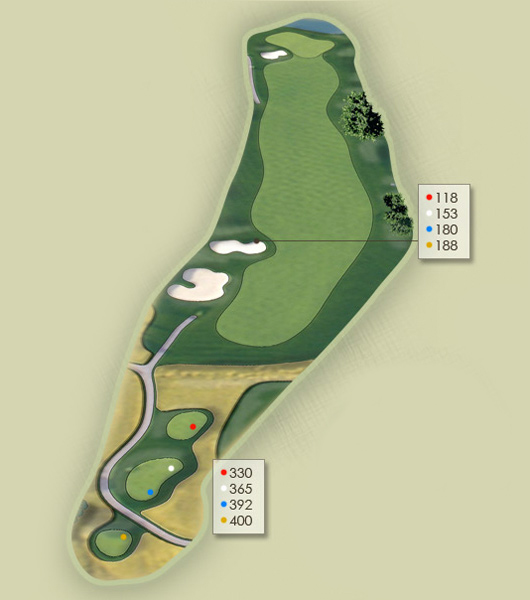
This short elevated hole plays a club shorter than it should. A ridge that separates the left and right sides of this green allows you to inch closer to the hole.
Deep bunkers and a split fairway challenge the longer hitters on this par five. The approaching fairway slopes right with a sneaky sand trap placed on the right side. The steep embankment along the left approach side often helps players both reach the putting surface and avoid the bunkers on the right. Carefully check your yardage and club selection as you approach this green.